Saturday, July 19, 2008

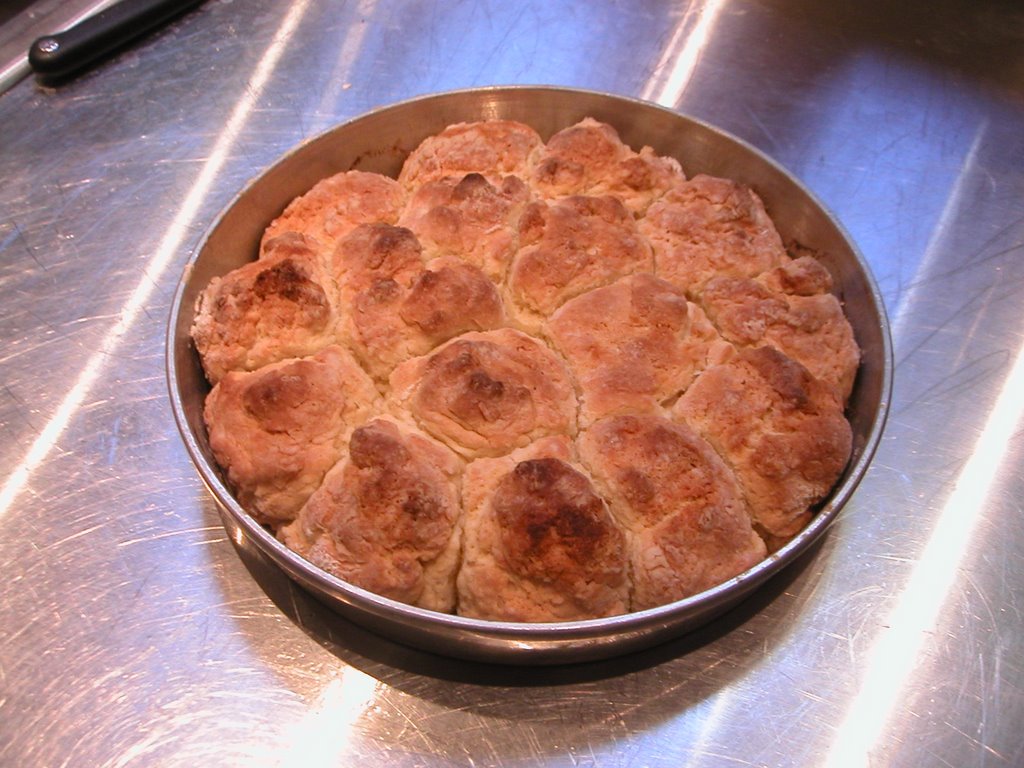
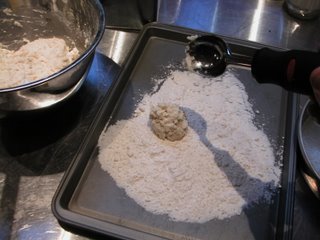
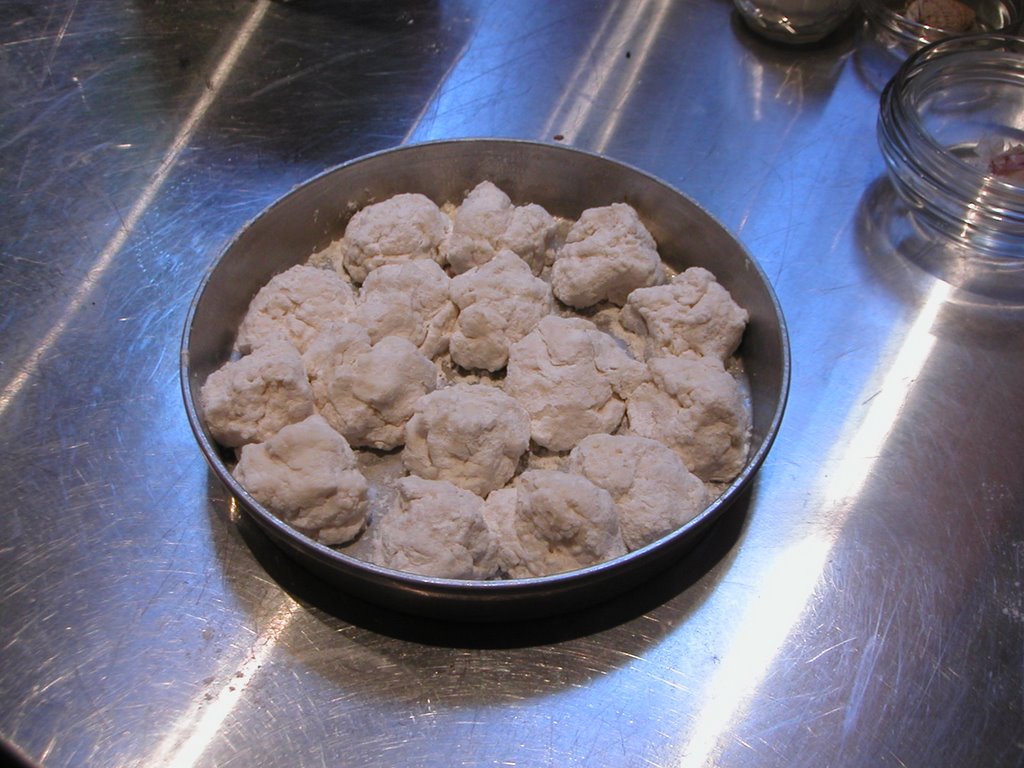
Guanciale Pasta alla Gricia

This was the New York Times recipe for Pasta alla Gricia that accompanied the great article by Florence Fabricant for Bucatini all’Amatriciana (or more specifically, the article was about guanciale). Micheal Tucker also gave a demo on the Martha Stewart show for Bucatini all’Amatriciana. I was not impressed with the NY Times version of Bucatini all'Amatricana, but we both loved the Pasta alla Gricia. However, you'll notice that Tucker really upped the fat, cheese, and guanciale for Martha's show (and audience). It makes me wonder if New Yorkers are that willing to give up flavor for calories, or if the rest of America needs huge boosts of flavor for satisfaction.

Recipe: Pasta alla Gricia from the New York Times


Published: January 16, 2008
Adapted from Sandro Fioriti
Time: 20 minutes
Salt
1 pound bucatini or rigatoni
1 tablespoon extra virgin olive oil
1 small onion, sliced thin
6 ounces guanciale, in 1-inch slivers 1/4-inch thick
Freshly ground black pepper
1/3 cup grated aged pecorino cheese, more for serving.
1. Bring a large pot of salted water to a boil and add bucatini or rigatoni.
2. Meanwhile, place a 12-inch skillet over medium heat, add olive oil, onion and guanciale. Cook until onion is translucent and barely starting to brown. Remove from heat.
3. When pasta is al dente, drain it, reserving 1 cup pasta water. Transfer pasta to skillet, place over medium-low heat and toss with guanciale and onion. Season with salt and generously with pepper; fold in about half the pasta water and the cheese. Toss, adding more pasta water as needed to help cheese coat pasta. Check seasoning and serve, with more cheese on the side.
Yield: 4 to 6 servings.

Recipe: Bucatini all’Amatriciana
Published: January 16, 2008
Adapted from Michael Tucker
Time: 45 minutes
1 tablespoon extra virgin olive oil
1 medium onion, sliced thin
3 cloves garlic, sliced
1/4 pound guanciale, in 1-inch slivers 1/4 -inch thick
3 cups canned San Marzano tomatoes (about a 28-ounce can)
1/2 teaspoon red chili flakes, or to taste
Salt
1/4 cup grated aged pecorino cheese, more for serving
1 pound bucatini.
1. Heat oil in a 12-inch skillet. Add onion and garlic, and sauté over medium heat until transparent. Add guanciale and sauté until barely beginning to brown.
2. Break up tomatoes and add. Cook about 15 minutes, crushing tomatoes with a spoon, until sauce has become somewhat concentrated and homogenized. Season with chili and salt and stir in 1 tablespoon cheese. Remove from heat.
3. Bring a large pot of salted water to a boil, add bucatini and cook until al dente, about 9 minutes. Drain and transfer to skillet. Gently reheat contents of skillet, folding pasta and tomato sauce together until they are heated through and pasta is well-coated, about 5 minutes. Fold in remaining cheese. Check seasoning and serve with more cheese on the side.
Yield: 4 to 6 servings.


From Michael Tucker and as adapted from the New York Times by the Martha Stewart show.
Serves 4 to 6
3 tablespoons extra-virgin olive oil
1 1/2 tablespoons butter
1/2 pound guanciale, cut into 1-by-1/4-inch pieces
1 yellow onion, thinly sliced
1 small clove garlic, sliced
3 cups (from about one 28-ounce can) canned whole plum tomatoes, preferably San Marzano
1/2 teaspoon crushed red pepper flakes
Coarse salt
1 pound bucatini pasta
1 1/2 cups freshly grated aged pecorino cheese, plus more for serving

1. Heat oil and butter in a large skillet over medium heat. Add guanciale and cook, stirring, until barely beginning to brown. Add onion and garlic and cook, stirring, until translucent.

2. Crush tomatoes and add to skillet. Cook, crushing tomatoes with the back of a spoon, until sauce has thickened, about 15 minutes; season with red pepper flakes and salt.

3. Bring a large pot of salted water to a boil, add bucatini and cook until al dente, about 5 minutes. Drain and transfer to skillet. Return skillet to heat and fold pasta and sauce together until heated through, about 5 minutes. Remove from heat. Fold in 1 1/2 cups cheese; season with salt and serve immediately with more cheese, if desired.

Blueberry Scones

Blueberry Scones From Cooks Illustrated
Published: July 1, 2007
Makes 8


It is important to work the dough as little as possible—work quickly and knead and fold the dough only the number of times called for. The butter should be frozen solid before grating. In hot or humid environments, chill the flour mixture and workbowls before use. While the recipe calls for 2 whole sticks of butter, only 10 tablespoons are actually used (see step 1). If fresh berries are unavailable, an equal amount of frozen berries (do not defrost) can be substituted. An equal amount of raspberries, blackberries, or strawberries can be used in place of the blueberries. Cut larger berries into 1/4- to 1/2-inch pieces before incorporating. Refrigerate or freeze leftover scones, wrapped in foil, in an airtight container. To serve, remove foil and place scones on a baking sheet in a 375-degree oven. Heat until warmed through and recrisped, 8 to 10 minutes if refrigerated, 16 to 20 minutes if frozen. See final step for information on making the scone dough in advance.
INGREDIENTS
16 tablespoons unsalted butter (2 sticks), frozen whole (see note above)
1 1/2 cups fresh blueberries (about 7 1/2 ounces), picked over (see note)
1/2 cup whole milk
1/2 cup sour cream
2 cups unbleached all-purpose flour (10 ounces), plus additional for work surface
1/2 cup sugar (3 1/2 ounces), plus 1 tablespoon for sprinkling
2 teaspoons baking powder
1/4 teaspoon baking soda
1/2 teaspoon table salt
1 teaspoon grated lemon zest
1. Adjust oven rack to middle position and heat oven to 425 degrees. Score and remove half of wrapper from each stick of frozen butter. Following photo at left, grate unwrapped ends on large holes of box grater (you should grate total of 8 tablespoons). Place grated butter in freezer until needed. Melt 2 tablespoons of remaining ungrated butter and set aside. Save remaining 6 tablespoons butter for another use. Place blueberries in freezer until needed.
2. Whisk together milk and sour cream in medium bowl; refrigerate until needed. Whisk flour, 1/2 cup sugar, baking powder, baking soda, salt, and lemon zest in medium bowl. Add frozen butter to flour mixture and toss with fingers until thoroughly coated.
3. Add milk mixture to flour mixture; fold with spatula until just combined. With rubber spatula, transfer dough to liberally floured work surface. Dust surface of dough with flour; with floured hands, knead dough 6 to 8 times, until it just holds together in ragged ball, adding flour as needed to prevent sticking.
4. Roll dough into approximate 12-inch square. Following illustrations, fold dough into thirds like a business letter, using bench scraper or metal spatula to release dough if it sticks to countertop. Lift short ends of dough and fold into thirds again to form approximate 4-inch square. Transfer dough to plate lightly dusted with flour and chill in freezer 5 minutes.
5. Transfer dough to floured work surface and roll into approximate 12-inch square again. Sprinkle blueberries evenly over surface of dough, then press down so they are slightly embedded in dough. Using bench scraper or thin metal spatula, loosen dough from work surface. Roll dough, pressing to form tight log. Lay seam-side down and press log into 12 by 4-inch rectangle. Using sharp, floured knife, cut rectangle crosswise into 4 equal rectangles. Cut each rectangle diagonally to form 2 triangles and transfer to parchment-lined baking sheet.
6. Brush tops with melted butter and sprinkle with remaining tablespoon sugar. Bake until tops and bottoms are golden brown, 18 to 25 minutes. Transfer to wire rack and let cool 10 minutes before serving.
To Make Ahead:After placing the scones on the baking sheet, either refrigerate them overnight or freeze. When ready to bake, for refrigerated scones, heat oven to 425 degrees and follow directions in step 6. For frozen scones, heat oven to 375 degrees, follow directions in step 6, and extend cooking time to 25 to 30 minutes.

Thursday, April 10, 2008

End of Gypsy dinners in Seattle

It was such a good time, it was bound to come to an end. Could anyone have predicted it would be an inside job, though? Today, Gypsy Dinners as we know them came to an end. Someone narked on the the associated cooking school, Culinary Communion, where most of the dinners took place, noting that it served wine to its students. This is a no-no in the Nanny state of Washington: as people paid for the class, so in effect they are paying for the wine, and the school did not have a liquor licence. So the school was fined, and threatened with random auditting. An email was sent out placing all wine and drink classes on hold until locations can be found.
To be on the safe side, Gypsy dinners were cancelled. Below is the emailed announcement:

April 10, 2008 (8 days shy of 4 years)
Camelot has ended. We wake up, we go
to work, we come home, we occasionally eat out. Most lives are fashioned after
this pattern. Most restaurant's lives are as well: make food, sell food, clean
up, go home. Sometimes, a very magical sometimes, restaurants are able to
trancend the merely ordinary and in doing so, transform to some small degree the
lives of its patrons. Gypsy has been this magical place for many many people.
New friends, new ideas, new love, a salon of creativity. But as with all things
destined to touch hearts, evil waits to take it away. We have been betrayed.
Gypsy as we know it was too scary a place to exist, so now it doesn't. We are
going much deeper underground. Those who really know how to get ahold of us,
please email (please don't call us), we will start a new list, a more protected
list. Dinners are cancelled for all intents and purposes. And to the traitor to
the clan we offer you this: May you never sleep well, may laughter sound bitter
in your ears, and may food always taste like ashes to you...this is our Gypsy
curse. You have destroyed a good thing.

Of course, they will be back, more cloak and dagger than before, and not so "wink, wink, nudge, nudge (secret dinner coming--be there)".

We got turned on to our first dinner a few years back and sat with a riot of a table. To tell you the truth, I wanted the office to supply me with a blackberry so I knew instantly when a dinner was announced--although I quickly learned that even if I could afford the dinner, I could not eat like that except once in a blue moon. One of my earlier blog entries, and certainly the most googled, regards the dinner prepared for Anthony Bourdain, where I got to eat at the rehearsal dinner. We made some great friends through the network that developed, so it is truly sad that it seems as though someone, for some disgruntled reason, told authorities all sorts of things just to ruin the party for the rest of the community.

Everyone will have to be more careful, more secretive, maybe even more selective. The inspiration and drive of Gypsy will bring it back stronger than before, but it will be different, less innocent.

Wednesday, April 09, 2008

Top Chef cookbook, or recipes to diminish your brand

The first article I read this morning was Betty Hallock's review of Bravo's Top Chef Cookbook. I enjoy the show as much as anyone (but not enough to watch it live--thanks, Tivo!). And I have made quite a few recipes, enough that I could strongly say that the show was never going to be Top Cookbook. Recipes were full of errors, with steps omitted, incorrect quantities of ingredients listed, or just blatantly poor instructions given.
Hallock wastes no time in butchering this downed cow of a cookbook (Michael Ruhlman, if you are reading this, please consider "Downed Cow Cookbook" for Golden Clog awards worst cookbook). She laughs at (not with) the "Top Coifs" and trivia pages, and then asks "But can you actually cook from it? Would anyone want to?" She lists the trite diagrams, advice, lists of ingredients, and further trivia, before dismissing the idea that anyone would want to prepare losing dishes, and the more gimmicky challenges.

She tries a few recipes, notably Marcel Vigneron's curried lamb kabobs, which she says were good. But the intern's attempt at a Quickfire winner Sunflower Seeds & Carrot Loaf, with Cilantro, Sesame & Squirt is "wretched", despite guest judge Suzanne Goins (one of my favorite chefs!) declaring it the winner on the show. This looks like one of the overpriced treats we give our pet bunnies, so maybe we will prepare it for them, minus the Squirt.

We tried to have a dinner club based on the Top Chef recipes. But after so many miserable attempts by some talented home cooks, we gave up. And if the recipes are dubious, then the computer printing method is heinous. Clicking the Print it button puts a single-page recipe on two pages, with the right side cut off. It is basic software programming--like the recipes, does anyone at Bravo test these things before they make them public?

Below are a few examples of recipes I tried at home.
Once I made the hot diabetic (Sam) Spicy Shrimp Ceviche with Chili Pepper Popcorn. This called for 6 oz medium uncooked shrimp to be "cooked" in a mixture of sliced red onion, 1 cup red wine vinegar, and 1/4 cup of sugar. A 1/4 cup of the mixture is placed over a salsa verde made with the juice of one lemon. This was his entry for Anger as part of Seven Deadly Sins Challenge. Ummm, it was more like envy or Sour. This was so acidic and sour that I could have used it clean the kitchen floor. There were far too few shrimp for the number of servings listed (was the wrong shrimp size listed, or the wrong quantity?)
I put it in a martini glass here, but also tried it in little Japanese bowls, where it took on a more Asian look, with the greens mounded to one side, the popcorn to another, and the shrimp and onions nestled amongst them. Either way it was barely edible.
But I did end up with a bag of popcorn. I hated popcorn until this day. Microwaved popcorn tastes nothing like stove-popped, nor does anything from the cinema, no matter how fancy they claim it to be. Since that day, we have been popping popcorn in duck fat, confit fat, bacon fat, foie gras fat, EVO, and browned butter. Duck confit fat remains our favorite though the experiments continue.
Remember Howie at the barbecue challenge? When he and his previous rival seemed to find admiration for one another over each other's meat? (sorry for the innuendo) He made a Braised Pork Shoulder with Yuca Sour Orange Mojo, that although it didn't win, somehow seemed more appealing. Reading the actual recipe, though, was less appealing and created doubt from the get go. For 6-8 servings it called for 6# pork butt, 5# yuca, 1 1/2 gallons of chicken stock, and a gallon of orange juice. I made some adjustments along the way, and the dish was OK.
Bravo and Top chef producers--get on the ball! Monitor the comments made by your readers, consult with the chefs, hire staff away from Cooks Illustrated's test kitchen to properly test your recipes, and correct the website. The goal is to keep eyeballs, not repel them.

I had high hopes for Dale's Colorado Rack of Lamb (better known as lamb in duck fat). It is pretty ingenious, yet so obvious, that I am sure a lot of talented chefs are kicking themselves over not having thought of it first, or more likely, not getting into the public domain first. The recipe looks OK, but somehow it fell short. I might try it again, but I can tell you that it certainly deterred me from some of the more adventurous recipes like Marcel's Sea Urchin & Meyer Lemon Gelee.


For being so annoying and in your face himself, Marcel's Cucumber and Radish Salad with a Citrus Yuzu Vinaigrette was surprisingly subtle and delicious. A friend would call it "precious food" but in this case the careful arrangement and attention to knife skills increased the overall flavor and appreciation. I would have made more of these for a dinner party, but didn't want to invest in those metal rings. However, Martha Stewart on her show with Ripert, said just make them out of used plastic water bottles or plastic food containers. She is so crafty as Boloud pointed out twice. BTW watch out for salt in prepared yuzu juice. It is not always listed.

It is surprising that so many people involved (chefs, producers, sponsors, et al) are letting their hard work and talent go down the drain, or into the garbage. You work hard to establish a brand, so why let it go down the tube because of a complacent editors, producers, and pissy webmasters? Take your balls back guys, rework your recipes until they are perfect, and then release them. The magic of television only works on TV, not on the taste buds.

Tuesday, April 08, 2008

Locavore and the bigger picture

National Retail Federation (the Voice of Retail Worldwide) in its trade magazine "Stores" has legitmized the "locavore" with the April cover story on the growing movement, calling it "a zeitgeist of 21st century retailing that describes the way an increasing number of people shop which, in turn, is impacting the way supermarkets stock their shelves."
This is the magazine that usually covers items like the effect of the current economy on affluent spending.

A more informed article, and adding several shades of gray to the matter appeared in the New Yorker by Michael Specter "Big Foot: In measuring carbon emissions, it’s easy to confuse morality and science". He turns common sense of buying local on its head when he interviews Adrian Williams, an agricultural researcher in the Natural Resources Department of Cranfield University, in England. "He has been commissioned by the British government to analyze the relative environmental impacts of a number of foods. 'The idea that a product travels a certain distance and is therefore worse than one you raised nearby—well, it’s just idiotic,' he said. 'It doesn’t take into consideration the land use, the type of transportation, the weather, or even the season. Potatoes you buy in winter, of course, have a far higher environmental ticket than if you were to buy them in August.' Williams pointed out that when people talk about global warming they usually speak only about carbon dioxide. Making milk or meat contributes less CO2 to the atmosphere than building a house or making a washing machine. But the animals produce methane and nitrous oxide, and those are greenhouse gases, too. 'This is not an equation like the number of calories or even the cost of a product,' he said. 'There is no one number that works.'
Three examples are cited:

New Zealand apples v. United States or Norther European apple
The environmental burden imposed by importing apples from New
Zealand to Northern Europe or New York can be lower than if the apples were
raised fifty miles away. “In New Zealand, they have more sunshine than in the
U.K., which helps productivity,” Williams explained. That means the yield of New
Zealand apples far exceeds the yield of those grown in northern climates, so the
energy required for farmers to grow the crop is correspondingly lower. It also
helps that the electricity in New Zealand is mostly generated by renewable
sources, none of which emit large amounts of CO2.
New Zealand Lamb v British lamb
Researchers at Lincoln University, in Christchurch,
found that lamb raised in New Zealand and shipped eleven thousand miles by boat
to England produced six hundred and eighty-eight kilograms of carbon-dioxide
emissions per ton, about a fourth the amount produced by British lamb. In part,
that is because pastures in New Zealand need far less fertilizer than most
grazing land in Britain (or in many parts of the United States).
Air-shipped Kenyan roses v Holland roses in England
Williams and his colleagues recently completed a study that examined the
environmental costs of buying roses shipped to England from Holland and of those
exported (and sent by air) from Kenya. In each case, the team made a complete
life-cycle analysis of twelve thousand rose stems for sale in February—in which
all the variables, from seeds to store, were taken into consideration. They even
multiplied the CO2 emissions for the air-freighted Kenyan roses by a factor of
nearly three, to account for the increased effect of burning fuel at a high
altitude. Nonetheless, the carbon footprint of the roses from Holland—which are
almost always grown in a heated greenhouse—was six times the footprint of those
shipped from Kenya. Even Williams was surprised by the magnitude of the
difference. “Everyone always wants to make ethical choices about the food they
eat and the things they buy,” he told me. “And they should. It’s just that what
seems obvious often is not. And we need to make sure people understand that
before they make decisions on how they ought to live.”


Of course, if we didn't insist on tasteless giant strawberries in the dead of winter or roses in February then all of this would be moot, now wouldn't it? Buy local, buy seasonal.

Saturday, December 29, 2007

A Return to Blogging

Hmmm, it has been awhile since I posted. I have been busy as hell, but also, since I don't have to fight Dale for the computer, it has sort of lost its impetus. And that time suck of a yard: last year we started on the roof terrace, making a temporary, non-structural arbor to provide shade from the elusive Seattle sun. Then this year, it was all about the dining terrace in the backyard. That was a time and money suck.

So to ease my way back in, I am going to make this an easy post.

We both love licorice (black, of course), and its family of flavors: fennel, anise, Pernod, Absinthe. So when it came to Christmas cookie baking, I decided to try something different than the usual chocolate, cinnamon, ginger, et al. I found two anise cookies. Anise Drops are by Martha Stewart, and were first featured in her Holiday Cookies; the other is an adaptation by Amanda Hesser of a Dorie Greenspan recipe. Martha's had a fantastic texture, and was pretty simple. Dorie's, however, had a better flavor, but was more complex to make, and it went hard in a few days. Dorie's texture at first was fluffy and chewy, with a slightly crunchy shell, almost like a meringue. Martha's recipe produced a similar texture, but was even more meringue like, with a harder shell, and still chewy inside. Admittedly I didn’t wait the 4-8 hours for Greenspan’s cookies. I am sure they would have been amazing, but who has that much counter real estate during the holidays?


I should also mention that Dale and a coworker made Martha’s recipe, and since we ate so many, we immediately threw together a second batch.

So below are both recipes, followed by a third that combines the best of both.

Anise Drops (Martha Stewart 2007)

1 1/2 cups all-purpose flour
1/2 teaspoon baking powder
1/2 teaspoon coarse salt
3 large eggs
1 1/4 cups sugar
1 teaspoon anise extract

Preheat oven to 350 degrees. Sift together flour, baking powder, and salt into a medium bowl; set aside.

Put eggs in the bowl of an electric mixer fitted with the whisk attachment. Mix on medium speed until eggs are fluffy, about 3 minutes. Gradually beat in the sugar until incorporated, about 3 minutes. Mix in anise extract. Reduce speed to low; mix in flour mixture. Transfer to a pastry bag fitted with a coupler or a 1/2-inch plain tip (such as an Ateco No. 806). Pipe 1 3/4-inch rounds onto baking sheets lined with parchment paper, spacing 1/2 inch apart.

Bake cookies, rotating sheets halfway through, until tops crack and cookies are very pale, 8 to 9 minutes. Transfer to wire racks using a spatula; let cool. Cookies can be stored in airtight containers at room temperature up to 3 days.


Anise Cookies "Paris Sweets," by Dorie Greenspans

Time: 1 hour, plus 4 to 8 hours' resting

2 cups sugar
3 tablespoons anise seeds
4 large eggs, at room temperature
2 cups all-purpose flour.

Line two baking sheets with Silpat mats. Fit a medium pastry bag with a 3/8-inch plain round tip (or use a small spoon).
Put sugar and anise seeds in bowl of a food processor, and process 1 minute to flavor sugar with anise. Pour sugar though a strainer into bowl of a mixer; discard anise seeds that remain in strainer. Crack eggs into bowl, and using whisk attachment, whip eggs and sugar at high speed until thick and pale, about 3 minutes. When you lift the whisk, the mixture should fall back on itself and form a slowly dissolving ribbon. Using a large rubber spatula, add flour through a strainer, folding it in gently in two additions.
Pipe or spoon rounds of the batter, each about 2 inches across, onto the Silpat mats, leaving about 1/2 inch between rounds. Let them rest, uncovered, at room temperature for 4 to 8 hours.
Position racks to divide oven into thirds, and preheat it to 350 degrees.
Bake cookies 12 to 15 minutes, rotating pans front to back and top to bottom midway, until they turn pale, almost white, and release easily from the Silpat mat. Transfer cookies to a rack, and cool to room temperature.
Yield: about 70 cookies.


AJ’s Anise Cookies

1 1/4 cups sugar
2 tablespoons anise seeds
1 1/2 cups all-purpose flour
1/2 teaspoon baking powder
1/2 teaspoon coarse salt
3 large eggs


Preheat oven to 350 degrees.

Put sugar and anise seeds in bowl of a food processor, and process 1 minute to flavor sugar with anise. Pour sugar though a strainer into bowl of a mixer; save anise seeds that remain in strainer for another use. Sift together flour, baking powder, and salt into a medium bowl; set aside.

Put eggs in the bowl of an electric mixer fitted with the whisk attachment. Mix on medium speed until eggs are fluffy, about 3 minutes. Gradually beat in the sugar until incorporated, about 3 minutes. Reduce speed to low; mix in flour mixture. Transfer to a pastry bag fitted with a coupler or a 1/2-inch plain tip (such as an Ateco No. 806). Pipe or spoon 1 3/4-inch rounds onto baking sheets lined with parchment paper, spacing 1/2 inch apart.

Bake cookies, rotating sheets halfway through, until tops crack and cookies are very pale, 8 to 9 minutes. Transfer to wire racks using a spatula; let cool. Cookies can be stored in airtight containers at room temperature up to 3 days.

Yield: about 50 cookies.


Equipment
I used this amazing silicone-coated parchment paper from Finland. It wasn’t cheap but I chalked that up to being “green” and at Whole Foods. But it has lasted a looong time. Sheets can be simply wiped off, and reused. And reused. And reused. Unlike many parchment paper, this is not bleached, nor does it contain chrome, a heavy metal.


Cookie sheets: the highly rated and heavy Vollrath. They stay hot a long time, so be sure to have extras while the first batch cools. They make an excellent wedding gift. http://www.cooksillustrated.com/images/document/testing/MJ05_CookieSheets.pdf

Tuesday, September 12, 2006

Molten Baked Alaska


WARNING: This is probably some of my worst writing ever. Its a cobbling of disparate recipes, over months, on 6 different computers.

Dale brought up a good point the other day as I proposed a cake for Tom's birthday. He said that everyone should know the favorite birthday cake of a significant other. (His tone of voice told me to take this seriously.) You can't just make something because you want to; it has to be the person's favorite. Since I haven't been asked what my favorite birthday cake is for years, I had to stop and consider this. True, Auntie H always made me a blueberry pie when I was a kid, but for adults?

So I gave Larry a call and had him determine what is Tom's favorite. It was chocolate, so for Tom's birthday, I decided on a variation of the ubiquitous molten chocolate cake, Baked Alaska, and Nutella.

(What I love about Baked Alaska as an architect is how the air bubble of the meringue act as an insulating layer against the heat of the over, keeping the ice cream from melting. Foam beer cup wraps at the foorball games do the same thing.)

Then I made a pact with Dale to clean the house of all my old copies of the New Yorker, Architectural Record, and the NY Times. This is setting a course for disaster. I mean come on: my ADD and addiction to magazines?!?!? Hours of distractions later, I came across this article from the NY Times for a layer cake with a heart of darkness, a heart of bittersweet chocolate darkness, an oozing fudgy center. Its like a layer cake elevated to nectar of the gods.

Following are the components for an amazing Baked Alaska.

Axo Chocolate Cake
Time: 40 minutes, plus 3 hours for cooling

8 ½ ounces (2 sticks plus 1 tablespoon) unsalted butter, more for greasing pan
7 ounces bittersweet chocolate (50 percent or higher cocoa), chopped
5 large eggs, separated
1 cup sugar
½ cup all-purpose flour
Pinch of salt

1. Place rack in top third of oven and heat to 400 degrees. (For best results, use a separate oven thermometer.) Butter a 9-inch springform pan and set aside. In a double boiler or microwave oven, melt together 8 ½ ounces butter and the chocolate. Stir to blend.
2. In a medium bowl, stir together egg yolks and sugar. Stir in flour. Add chocolate mixture and stir until smooth. Using an electric mixer, whisk egg whites and salt until stiff but not dry. Fold whites into chocolate mixture just until blended. Pour into cake pan.
3. Bake for 25 minutes. Remove cake from oven and allow to cool for 1 hour. Wrap with foil and refrigerate until cake is firm and cold, at least 2 hours. Two hours before serving, remove cake from refrigerator and bring to room temperature. Slice (center of cake will be fudgy) and serve, if desired, with whipped cream.


Ice Cream:
3 pints best-quality vanilla ice cream
1/4 cup nutella


Line 8" round cake pan with plastic wrap with enough to wrap over the top. Scoop ice cream into pan, smoothing into corners and flattening top. Pull the overhanging plastic over, and place in the freezer. Freeze overnight.


Meringue:
4 large egg whites, room temperature
1/2 tsp. cream of tartar
1/3 cup granulated sugar
1/3 cup firmly packed dark brown sugar
1/2 tsp vanilla

For Assembly/Meringue: Bring egg whites to room temperature in a medium, stainless or copper bowl. Stir together both sugars in a small bowl, pressing out as many lumps as possible. Cover and set aside.


Twenty to thirty minutes before serving, adjust oven rack to one-third up from bottom of oven, preheat the oven to 475 degrees F. About 10 minutes before you want to bake the dessert, remove the cake layer (NOT the ice cream layer) from the freezer. Remove the wrappings from the cake, and place the cold (but not frozen) cake layer right side up on the foil-lined baking sheet. Spread with a nice layer of nutella.

Sift the cream of tartar into the egg whites. Beat whites at low speed to incorporate cream of tartar, then increase speed to high and beat until very foamy and white. Begin adding combined sugars, about two tablespoons at a time, beating after each addition until incorporated. After last addition, beat until meringue stands in stiff peaks; this will be a thick meringue.

Remove top plastic from ice cream, and center over the cake. Remove the pan and plastic.
Like icing a cake, fold about half the meringue onto the ice cream. With a flat knife or offset spatula, work the meringue down the sides of the cake and ice cream, going right down to the foil on the baking sheet. Repeat with remaining meringue; the ice cream and cake should be entirely and thickly covered with the meringue. Immediately place the dessert in the hot oven for 3-5 minutes, or just until the meringue is lightly browned. Remove from oven. Serve immediately! Pass optional sauce for everyone to pour on if they wish.


If you are inclined to glitter the already gilded lily, try this chocolate sauce from Cooks Illustrated (Jan 2002).

Simple Chocolate Sauce.
3/4 cup heavy cream
3 tablespoons light corn syrup
3 tablespoons unsalted butter, cut into three pieces
table salt
6 ounces bittersweet chocolate, chopped fine

Bring heavy cream, corn syrup, butter, and salt to boil in small nonreactive saucepan over medium-high heat. Off heat, add chocolate while gently swirling saucepan. Cover pan and let stand until chocolate is melted, about 5 minutes. Uncover and whisk gently until combined, avoiding airbubbles. (Can be cooled to room temperature, placed in airtight container, and refrigerated for up to 3 weeks. To reheat, transfer sauce to heatproof bowl set over saucepan of simmering water. Alternatively, microwave at 50 percent power, stirring once or twice, 1 to 3 minutes.)
Makes 1 1/2 cups

Labels: , , , ,

Tuesday, September 05, 2006

Riding the Gravy Train: Sausage Gravy and Biscuits


Man, these Southerners are a lot of work. Just because they lost the war, they think they have the right to turn their noses up at all things and ways Northern: our iced tea, our hospitality, our peaches, our porches (OK, anyone who has moved here recently can give you examples of Seattle hospitality, aka the “Seattle Freeze”). Yet of particular issue is that of biscuits. We Yankees just can’t get the biscuits right, according to them. They are either too light and crumbly or too dense.

Well after making biscuits for Dale, I have figured out the problem: Southerners. You see, Southerners have two different kinds of biscuits in mind. The first is light and crumbly and is perfect with jam, honey or other preserves and lots of black coffee. The second is more firm, dense, and stands up to the onslaught of gravy with sausage bits. Prepared biscuit mixes don’t pass and most recipes don’t either. Biscuit mixture is more like a batter than a dough, so recipes that lacked enough liquid were pretty quickly passed over. Not surprisingly, the first recipe that passed Dale’s muster and received the highest accolade “These are just like my Mom’s!” came from Cooks:
Mile High Biscuits. The interior was fluffy while the top was crisp; they rose high, but retained a tender crumb. My aunt’s freezer jam—which I hide from Dale—was delicious on them, and the entire batch was gone before the second pot of coffee brewed.

Interestingly enough, the original recipe adapted by the CI Bostonians was Floridian Shirley Corriher’s Touch-of-Grace Biscuits. After the triumph of her Lemon Meringue Pie, I couldn’t wait to try these. The recipe was extremely different from Cooks, but I nevertheless expected the same fluffy, tender biscuit. Wrong. In fact, they were so different I thought I might have done something wrong, until Dale explained that no, these were perfect gravy biscuits, and were just like his good grandmother’s. These were dense and not as flavorful as I used lard (even though it called for shortening, not butter. Even lovingly spread with butter and fresh strawberry jam we couldn’t finish them. (But the squirrel we tossed a chunk sure loved it as he devoured a chunk that proportionally for us would be size of a beach ball.)


The secret to both of these biscuits is a very wet dough, dropped into flour for ease of handling, then placed in a baking dish. The dollops of floured dough, as you gently pass from one hand to another feel like large powdered yolks, which threaten to spill into gooey globs at any second.

This Labor Day though, for all of his hard work on our cocktail party the day before, I made Dale Biscuits with Sausage Gravy. Of course, I used Corrihers Touch of Grace biscuits, but used butter instead (out of lard). They were out of this world. They were delicious as batter, with jam, with sausage gravy; they were tasty hot, cold, and even one day old. The crumb was firm, yet airy; the flavor was embracing, but let the preserves and the sausage shine. And the verdict from Dale? “These are better than my Mom’s and even she would agree.” For the hell of it, I included the Cook’s recipe but I say: One nation, one biscuit.

-----------------------------
Touch of Grace Biscuits Adapted from Shirley Corriher


2 cups self-rising, low-protein flour (aka Southern flour such as White Lily, Martha White or Red Band
1/4 cup sugar
1/2 teaspoon salt
Baking -------
4 tablespoons shortening or lard or butter
2/3 cup cream
1 cup buttermilk (approximate)
1 cup all-purpose all-purpose flour, for shaping
2 tablespoons butter, melted

Note: I used 1 ½ cups All-purpose flour with ½ cup cake flour and 1 1/2 teaspoons baking powder with 1/8 tsp baking soda.

1. Heat oven to 425 F and arrange one shelf slightly below the center of the oven. Spray an 8- or 9-inch cake pan with nonstick cooking spray.

2. In a large mixing bowl, stir together the dry goods (minus the shaping flour). Work the shortening or lard in with your fingertips until there are no large lumps. Gently stir in the cream, then the buttermilk. (It may take less than 1 cup of buttermilk, or if you are using a higher protein flour, it may take more.) The dough should not be soupy, but should be wet and resemble cottage cheese.

3. Spread the all-purpose flour on a rimmed baking sheet. With an ice cream scoop or spoon, place 12 even mounds of dough in the flour. Sprinkle flour gently over each mound. Flour your hands, then gently pick up a mound, coat it with flour and gently shape into a round, shake off excess flour, and place it in the prepared cake pan, with 9 along the perimeter, and three in the center. Continue shaping biscuits the same way, placing each biscuit up tight against its neighbor in the pan, until the dough is used. Brush with melted butter.

4. Place pan in the oven and bake until lightly browned, about 20 to 30 minutes. Let biscuits rest two minutes. Invert into a towel or napkin-lined basket, turn right side up and break apart. Let rest a few more minutes to let the steam escape and serve.

~~~~~~~~~~~~~~~~~~~~~~~~~~~~~~~~~~~~~~


Seattle is famous for its seafood and coffee but it is also getting national raves for its charcuterie. Whether it’s a pound of kielbasa for the grill or a sausage sandwich from
Uli’s Famous Sausages or a ¼ pound of lamb prosciutto from Salumi, these small producers of forcemeat are part of a small but growing national trend to embrace real meat cured or processed in time-honored, traditional ways.

Sausage Gravy
Adapted from Uli’s Famous Sausages

1/2 pound of sausage, preferably spicier versions such as linguica, chorizo, or andouille
1/4 cup all purpose flour
2 cups of milk
1/2-teaspoon salt
1/4 teaspoon freshly ground pepper

Remove casings and chop sausage. Cook sausage in medium saucepan over medium to high heat until browned, stirring to crumble. Drain off all fat except about 2 tablespoon. Stir in flour. Cook stirring constantly until thick and bubbly. If there is no or little fat, just keep stirring to cook the flour until thick. Gradually whisk in milk, salt and pepper. Cook stirring constantly until thickened and bubbly. About 5 minutes. Makes 4 servings.

~~~~~~~~~~~~~~~~~~~~~~~~~

Mile High Biscuits Adapted from Cooks Illustrated

Dough
1 ½ cups unbleached all-purpose flour (7 1/2 ounces)
1/2 cup whole wheat flour ( 2 1/2 ounces)
1 tablespoon double-acting baking powder
1 tablespoon granulated sugar
1 teaspoon table salt
1/2 teaspoon baking soda
4 tablespoons unsalted butter (cold), cut into 1/4-inch cubes
1 ½ cups buttermilk cold, preferably low-fat

To Form and Finish Biscuits
1 cup unbleached all-purpose flour (5 ounces), distributed in rimmed baking sheet
2 tablespoons unsalted butter, melted

1. Adjust oven rack to middle position and heat oven to 500 degrees. Spray 9-inch round cake pan with nonstick cooking spray; set aside. Generously spray inside and outside of 1/4 cup dry measure with nonstick cooking spray.
2. For the dough: In food processor, pulse flours, baking powder, sugar, salt, and baking soda to combine, about six 1-second pulses. Scatter butter cubes evenly over dry ingredients; pulse until mixture resembles pebbly, coarse cornmeal, eight to ten 1-second pulses. Transfer mixture to medium bowl. Add buttermilk to dry ingredients and stir with rubber spatula until just incorporated (dough will be very wet and slightly lumpy).
3. To form and bake biscuits: Using 1/4 cup dry measure and working quickly, scoop level amount of dough; drop dough from measuring cup into flour on baking sheet (if dough sticks to cup, use small spoon to pull it free). Repeat with remaining dough, forming 12 evenly sized mounds. Dust tops of each piece of dough with flour from baking sheet. With floured hands, gently pick up piece of dough and coat with flour; gently shape dough into rough ball, shake off excess flour, and place in prepared cake pan. Repeat with remaining dough, arranging 9 rounds around perimeter of cake pan and 3 in center. Brush rounds with hot melted butter, taking care not to flatten them. Bake 5 minutes, then reduce oven temperature to 450 degrees; continue to bake until biscuits are deep golden brown, about 15 minutes longer. Cool in pan 2 minutes, then invert biscuits from pan onto clean kitchen towel; turn biscuits right-side up and break apart. Cool 5 minutes longer and serve.